I’ve been getting into hand tool woodworking for the past year or two. As part of that, I’ve been putting together a set of tools mostly on an as-needed basis. I’ve gotten to the point where I feel I have most everything I need for simple frame furniture construction. Since it’s fresh in my head, I thought I’d document what articles I used for research and what tools I ended up buying based on that research.
Sources
My primary recommendation for your research is this excellent series of articles at Wood and Shop. It doesn’t dive much into specific tool models, but does give some idea of the scope of tools you’ll need as a beginner and what you might get next as you get into more complex projects.
Next, I suggest watching videos of woodworkers on YouTube. You can see what kinds of tools they use in real projects. In particular I recommend Paul Sellers’s channel. You can also see a great overview of common hand tool usage in this video from Mike Siemsen.
Beyond that, I’ll give more specific resources for each type of tool below.
In general, the recommendation I’ve found is to strongly prefer either vintage tools from before the 1940s, or brand new tools from either Lie Nielsen (Made in USA) or Veritas at Lee Valley (Made in Canada).
Older tools were expensive at the time and were very well made, but are mostly cheap now. New tools are expensive now, and also well made. New, cheap tools are what give modern tools a bad reputation: it’s not that “things were made better back in the day,” it’s that cheap crap simply wasn’t available!
So as a new woodworker looking for the best bang for your buck, you’ll want to buy vintage tools. But don’t forget that modern toolmakers making excellent tools do exist. Some vintage tools are no cheaper than their modern, high quality equivalents. It’s always worth comparing prices. New tools also have the advantage of knowing exactly what you’re going to get, and know you’re not going to have to refurbish the thing before you can use it.
What follows here is a list of tools I’ve purchased and how I decided to make those purchases.
Rough dimensioning
Here’s the tools I use for dimensioning lumber roughly to shape.
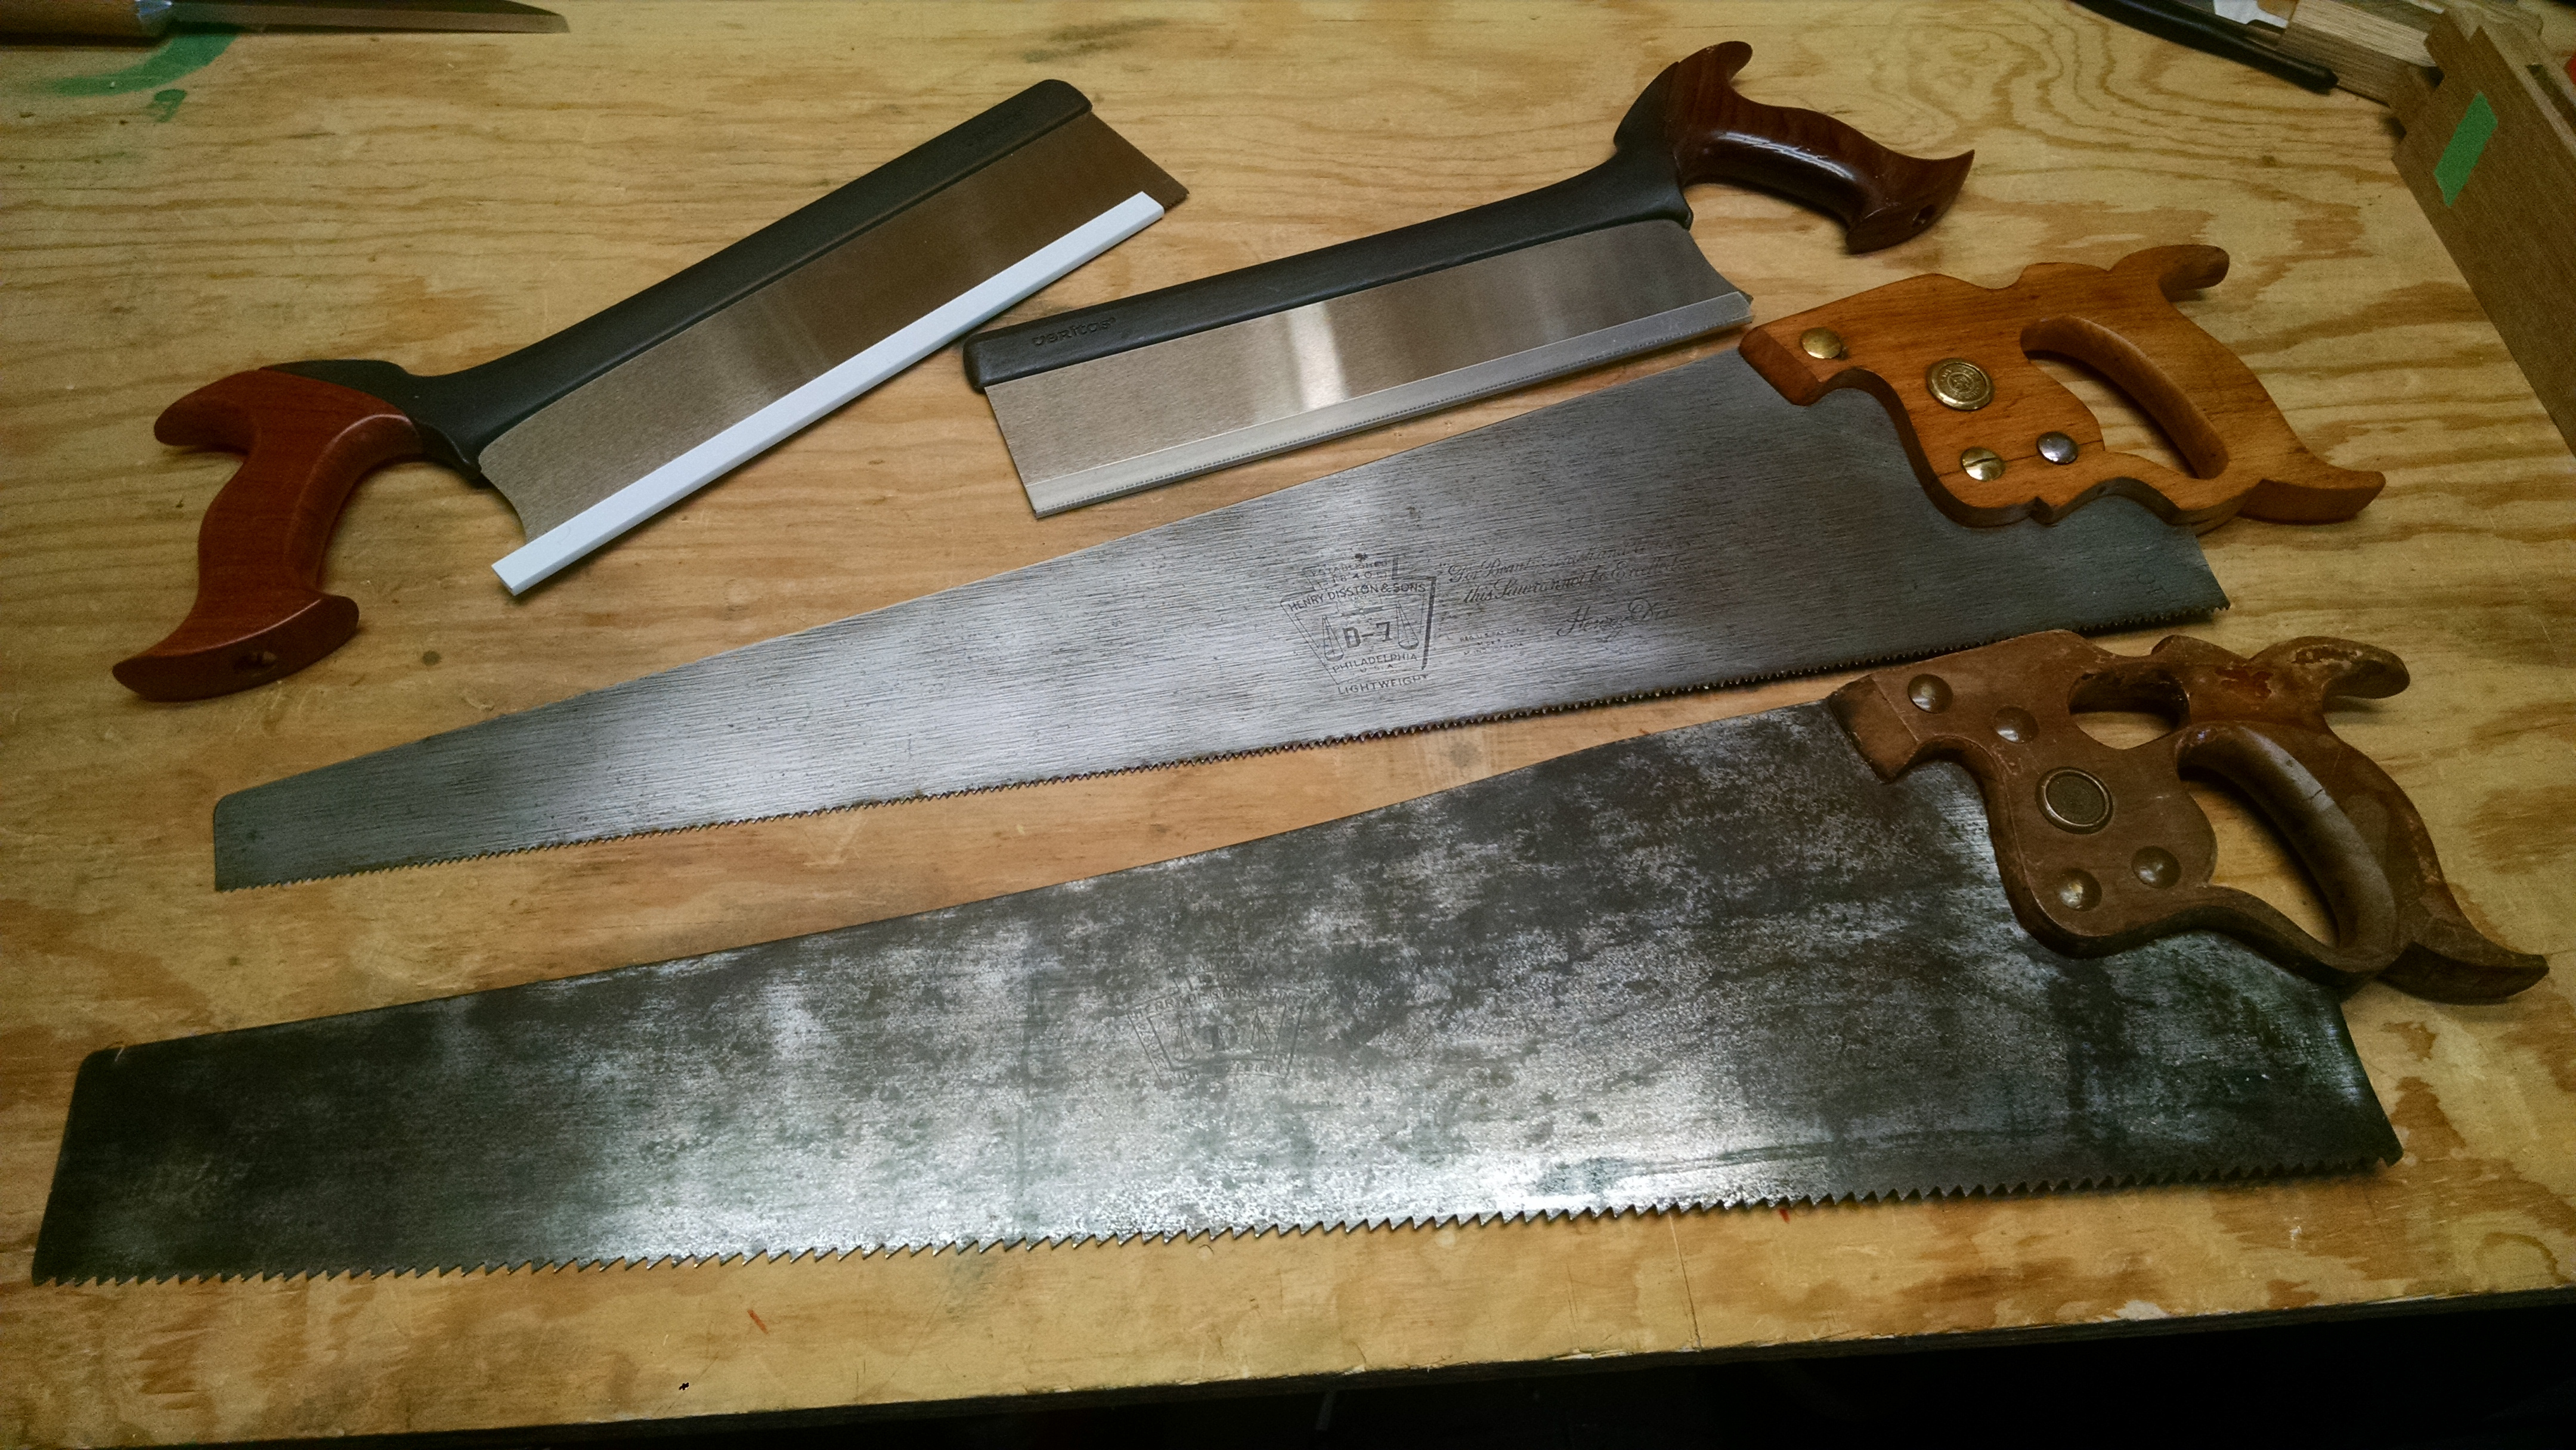
I have two full-size (26″) Disston handsaws, one 4 PPI D-8 rip cut and one 10 PPI D-7 cross cut, both manufactured around 1900. These were bought on eBay for about $30 shipped, each. The Disstonian Institute is a fantastic resource for learning about Disston saws. The author covers every Disston saw that you might want to use. There are a billion vintage saw brands, but Disston is widely recommended and plenty cheap, so I just stick with that. A less aggressive rip cut saw is on my to-buy shortlist. It may be fast, but 4 PPI is pretty brutal to the wood.
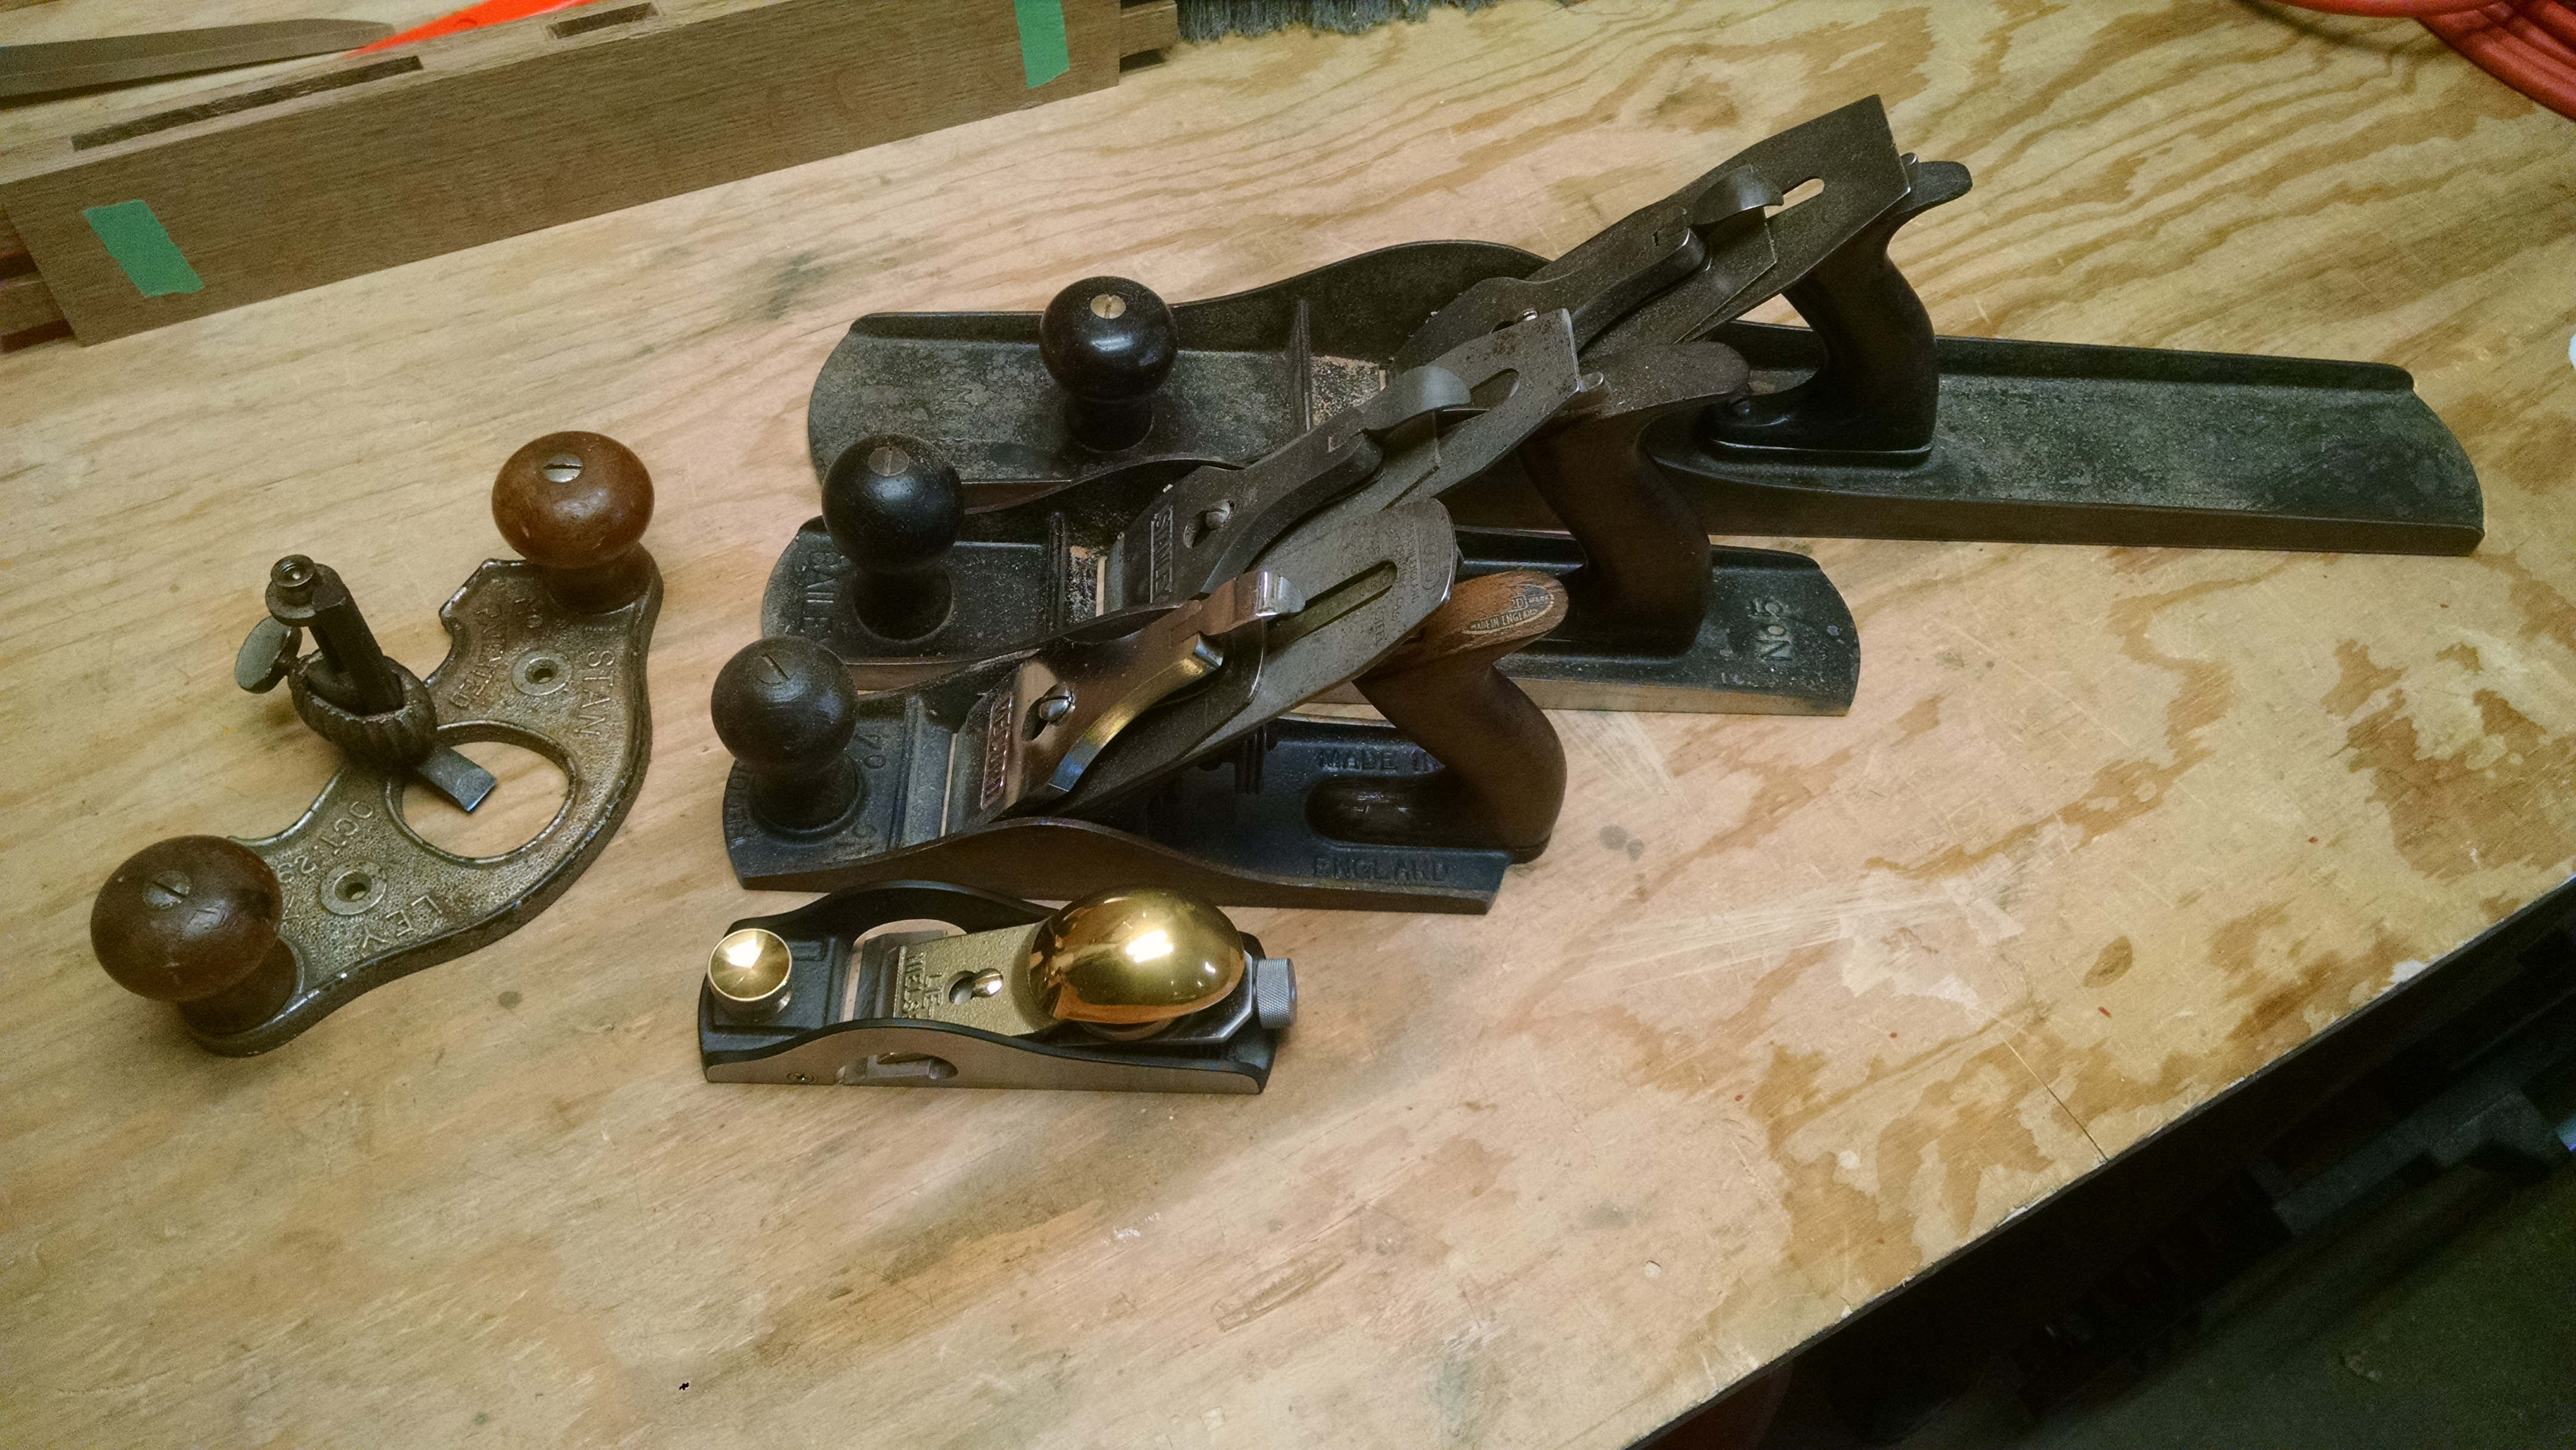
For planing to thickness, I use my vintage Stanley No 5 plane with the iron set deep. For Stanley planes, if you’ve got the piece in hand or have good photos, you can date them with the Stanley plane dating flowchart. Again, shoot for something older than 1940. My No 5 turns out to be from the 1920s. I got it for $35 shipped on eBay.
A word on buying from eBay. Search for the tool you want, then check the “Sold Listings” filter box on the left. This will tell you what prices the tool is actually selling for. Get a good feel for the range of prices, taking into account the condition of each sold tool, then set a target condition and price for yourself. Every time you see a tool pop up in your target condition, bid your max, and forget about it. The trick is to just let the good ones go to higher bidders. If the tool is commonly sold, like most Stanley planes, you’ll eventually win one at your target price by slipping through the higher bidders. If you haven’t won one in a couple of weeks, do the price analysis again and adjust accordingly.
Flattening
My primary tool for flattening long boards is a Stanley No 8C from around 1900. I wanted a No 7, but a No 8 was available locally for $100. No cheaper than eBay, but saved me a bundle on shipping. For shorter boards, I just use the No 5.
I use home made winding sticks along with my No 5 to remove twist.
Joinery
Once the boards are flat, it’s time for joinery.
I bought a pair of Veritas dovetail saws for about $80 each, one rip and one crosscut. This was an early purchase; these days I probably would spring for cheaper vintage backsaws on eBay. But these saws came highly recommended from a number of sources, and I didn’t know at the time how to shop for vintage tools, so they let me get started faster. I use these for cutting tenons, small cross cuts, or any other cuts on already-flattened boards.
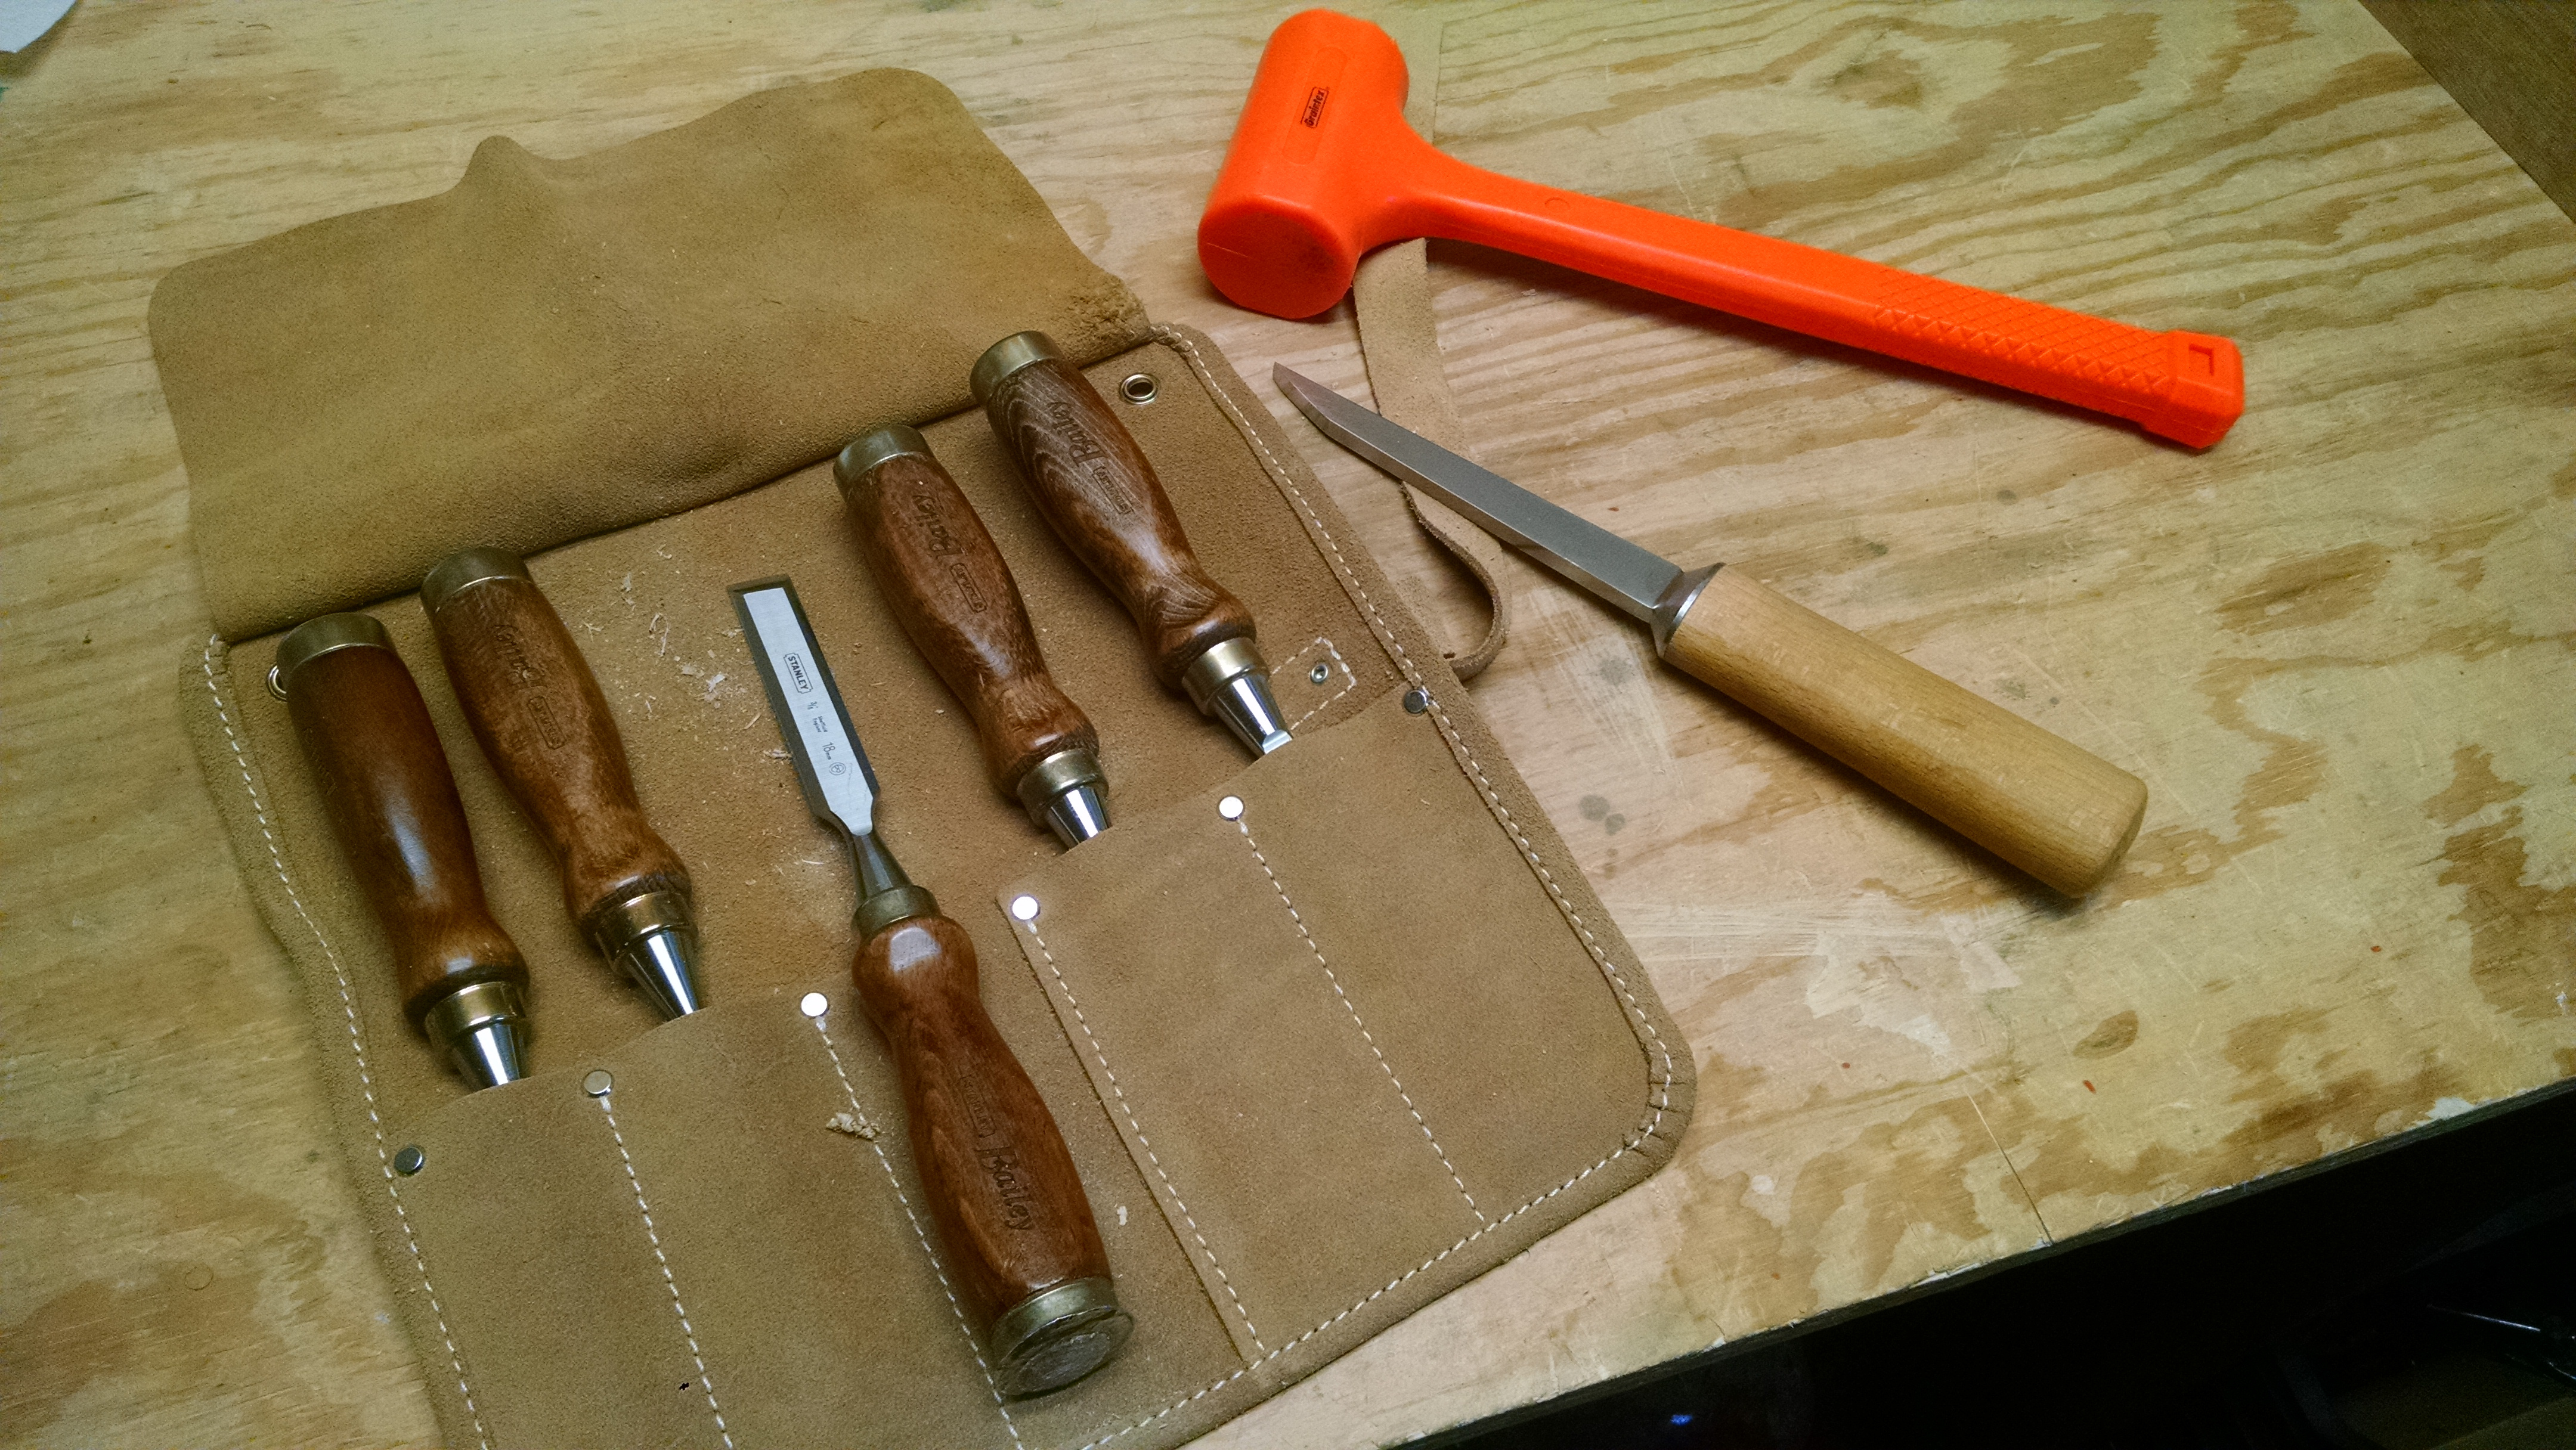
My bench chisels are a modern Stanley Bailey set of 5, purchased on Amazon for $70. Another early purchase, but I do somewhat stand by this one. Vintage chisels seem difficult to shop for: they are often unbranded, so you don’t really know what you’re getting. On the other hand, vintage chisels are super cheap, on the order of a few bucks apiece, so you’re not risking much.
For my first few projects, I used my bench chisels to cut mortises. A recent purchase was a single Ray Iles 5/16″ mortising chisel on eBay for $70 shipped. This thing cuts mortises way better than the bench chisels did. The straight sides of the chisel, as opposed to the beveled sides of standard bench chisels, prevent the chisel from accidentally twisting in the mortise and widening it. As I mentioned, I find shopping for vintage chisels difficult, so I opted for a high quality modern one instead. You only really need one or two mortise widths anyway, so this 5/16″ should be sufficient for most things.
I also recently purchased a Stanley No 71½ router plane, a little over a hundred years old, from Patrick Leach at The Superior Works. Patrick sells a huge range of vintage tools. He doesn’t maintain a website, instead you have to sign up for his mailing list to get the tool list each month. I bought from him partly because I was having poor luck on eBay and wanted to try a private seller. The router plane was bought for about $100 shipped, which is a little more than I would have paid for a “good deal” on eBay, but still not a bad price. I may buy from Patrick again.
Other good options for router planes are either of the ones sold by Veritas and Lie Nielsen. They’re priced both comparably with vintage Stanley routers. All three makers are slightly different and have advantages and disadvantages. Chris Schwartz wrote a great comparison review of both of the modern varieties. No clear winner here; make your own decision.
The Wood and Shop article linked above gives a glowing recommendation for the Lie Nielsen Rabbet Block Plane. I bought one of these direct from Lie Nielsen for $175, which makes this little guy my most expensive single tool. It’s great for sneaking up on the tenon width when fitting it into your mortise. The nicker blades make the necessary crosscut against your tenon shoulder to avoid tearout on the tenon surface. It’s a great little tool and I’m glad I have it. I do find it difficult to adjust the iron to be both flush with one edge and parallel to the sole. I expect I just need more practice. I think you could get away with a vintage shoulder or rabbet plane for much cheaper, but this is a nice tool.
Shaping
For doing final smoothing, I have an English-made Record No 4 from the 1950s that I bought privately from the same guy I bought the Ray Iles chisel from, $40 shipped. According to some brief research I did, Record is regarded as being slightly higher-end than Stanley, but near enough that it makes no difference. The seller kindly sharpened and honed the blade for me, and this thing takes the finest shavings leaving a great, shiny surface.
I don’t yet have a card scraper, but that’s only because I keep forgetting to drop one into the shopping cart at Lee Valley. One of these days I’ll remember.
I’d also like to get a spoke shave, but I haven’t done much research here yet. I’ve seen both vintage and modern recommended. This needs a price comparison, taking into account how much restoration needs to be done on old tools. For example, how hard is it to sharpen a vintage spoke shave?
Sharpening
Both of my hand saws required sharpening upon receipt; yours will too. On Paul Sellers’s recommendation, I buy Bahco triangular saw files from Lee Valley and shape my own handles for them. I built my own saw sharpening “vise” by sawing a kerf down the middle of some long scrap 1×1, which I then just clamp to the bench with my saw in it. I guess you can buy a vintage metal one if you’re into that.
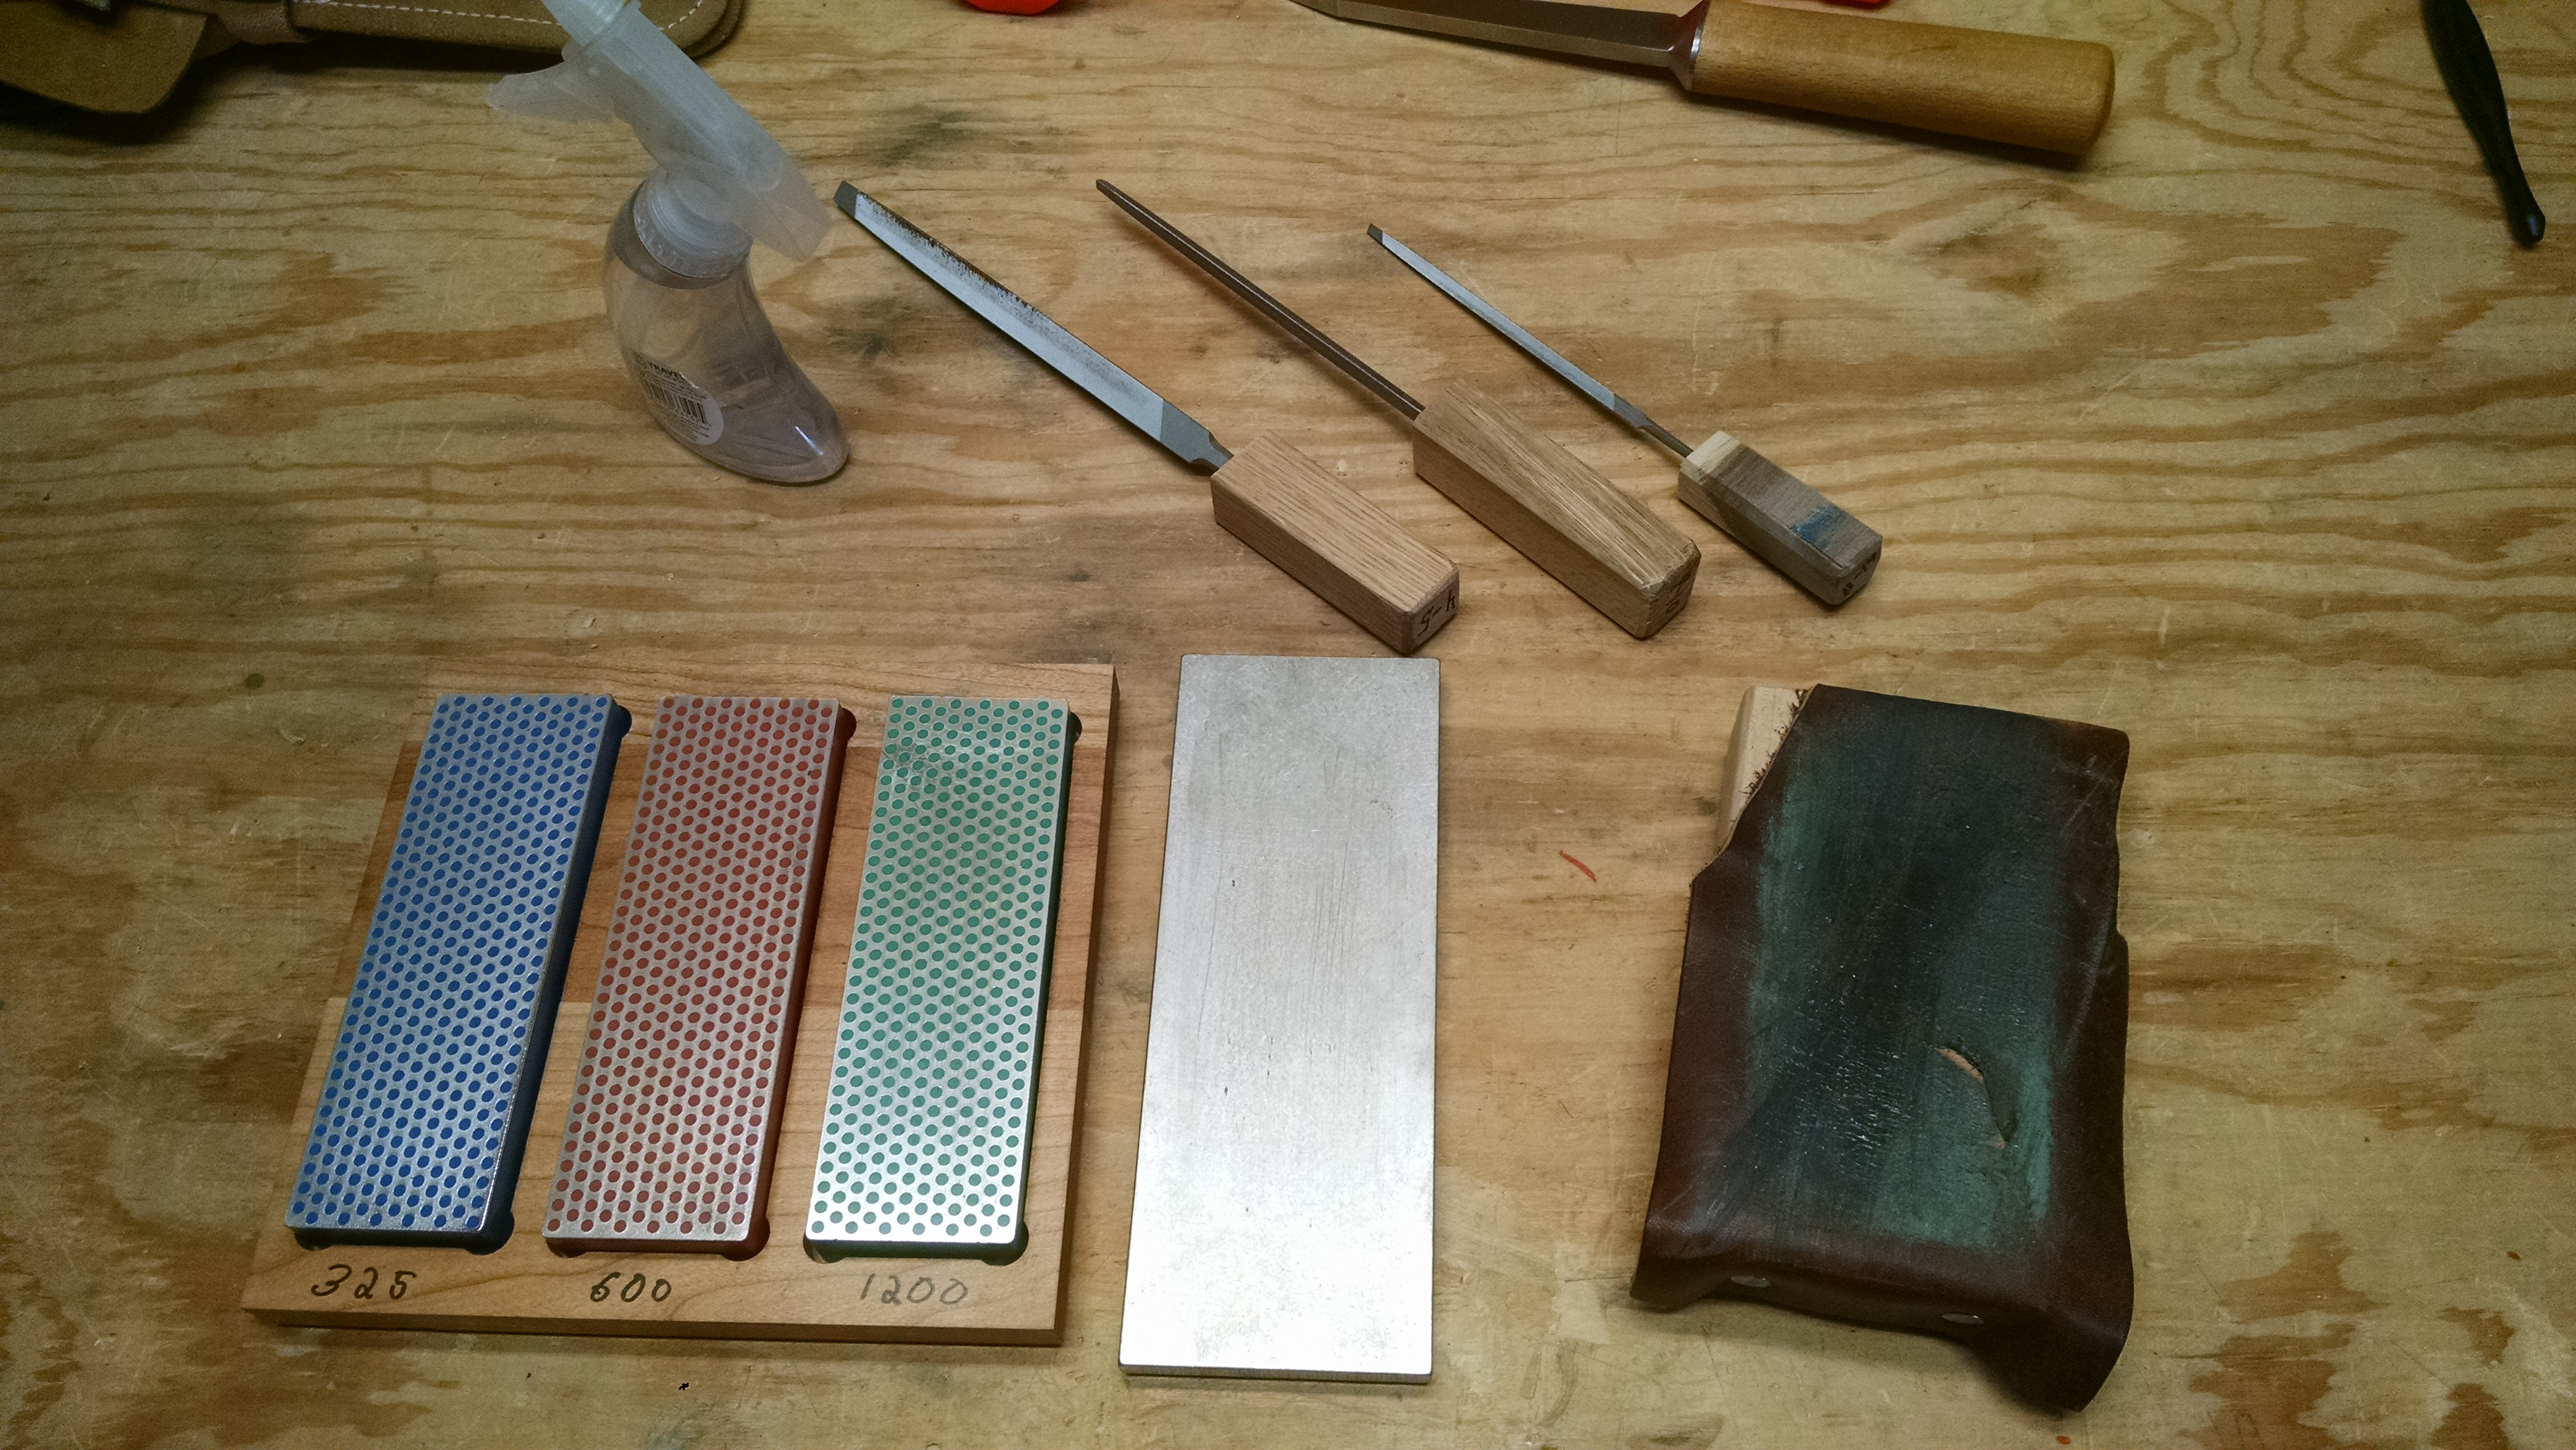
For sharpening chisels and hand planes, I bought the three-plate diamond plate set from DMT on Amazon for $100. It comes with 325, 600, and 1200 grit diamond plates (by DMT’s measure; each manufacturer has their own standard) in a nice little box. It does well enough, but I won’t be purchasing it again when these wear out. They’re quite small for plane blades, and I really don’t like the polka dot pattern. When sharpening plane blades, you rock the blade up on each edge to give it a very slight radius. This helps prevent plane tracks in your surface, but the trouble is the corners then get caught on the polka dot indentations. I like diamond plates, so I’ll continue buying DMT. But instead, I’ll start getting their flat, and much more expensive, 8″x3″ plates. I already have one of these in 8000 grit. This will hopefully help with planing end grain, which I have been struggling with.
I also built a leather strop with some scrap leather from a local wacky goods surplus store (5 cents) nailed to a length of scrap construction grade pine I had laying around. I use some green, extra-fine buffing compound I bought on Amazon. Paul Sellers has a good sharpening video where he shows how to use a leather strop.
Measuring and marking
For rough cuts, I’ve got some old tape measure. Whatever. I’ve also got a cheapo combination square from the hardware store for making roughly-square cuts. It’s nice to have one you don’t care about, in case you drop it while shifting around rough lumber.

For careful work, I use a 12″ Starrett combination square from Amazon for about $70. The length is nice for wider boards, but I think I’d also like to pick up a 4″ or 6″ square for finer work, since the 12″ blade gets quite unweildy at smaller board sizes.
At the recommendation of the above Wood and Shop article, I picked up a Veritas dual marking gauge, but I’m not in love with this tool. I used it for marking mortises for a while, but now I just do it with my square and a pencil or marking knife, which I find much less fiddly. The furniture I’ve been building tends to be human-scale (tables, coat rack, etc) so getting absolute accuracy isn’t that important. Maybe I’ll be glad to have this when I do finer work like box or drawer making. I don’t regret it, but it spends most of its time in a drawer.
Speaking of marking knifes, I have been using some old Stanley box cutter so far. It has worked well enough, but always felt kind of clumsy. I picked up a Veritas striking knife, but haven’t yet had a chance to use it. I’ll update this with thoughts later.
Work bench
Confession time: I don’t yet have a work bench. I have some old sheets of plywood screwed together by my house’s previous owner. My solution for work holding is pipe clamps against the plywood. Yuck.
A real bench will be my first project when the weather thaws. I decided to go with Chris Schwartz’s knockdown Nicholson (sometimes called an English bench). I picked this bench for a few reasons. A big one was Schwartz’s reputation: he wrote a big book on workbenches, and this is where he ended up. Also, I wanted something quick to build and cheap. This bench has no complicated joinery, just a handful of dadoes. It’s also used in the video I linked above where Mike Siemsen shows how to use a bench with just holdfasts and no vise. Having no vise saves me a boatload of money, and I can always retrofit one later if I need. Here, have a bunch of links:
- Video overview and short discussion from Chris
- Introduction and discussion from Mike
- Free PDF and Sketchup plans for download
- Suggested materials list
There are other workbench options. Another popular one is the Roubo bench (sometimes called a French bench). I decided against this because I want a front apron for work holding. Paul Sellers also has an excellent video series of his workbench build. This is close to what I want, but I think the Nicholson looks simpler to build.
Conclusion
This was basically a list of all the tools I own in my work shop. With a couple exceptions that I noted, I wouldn’t want to do without any of them. By carefully buying vintage tools, I’ve been able to keep costs quite low without introducing much extra refurbishing work. I’m eager for spring to come back around so I can get back to woodworking in earnest.
Nice post. Actually, every woodworker needs to know basic woodworking tools. I have checked your list and I think you have missed bench vise.