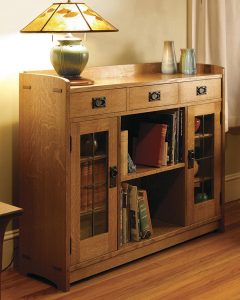
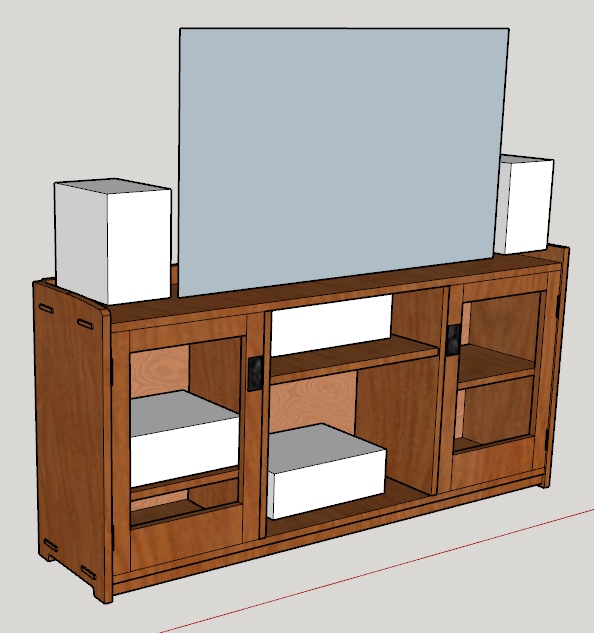
Since we moved into our house, our TV has been mounted above the fireplace. As I was wrapping up The Cat Tower, I decided my next project would be a cabinet to place the TV on and my various video game systems in. I knew the design I wanted right away. I follow Mike Pekovich, an editor at Fine Woodworking magazine, on Instagram, and he had posted a picture of a cabinet that I absolutely loved.
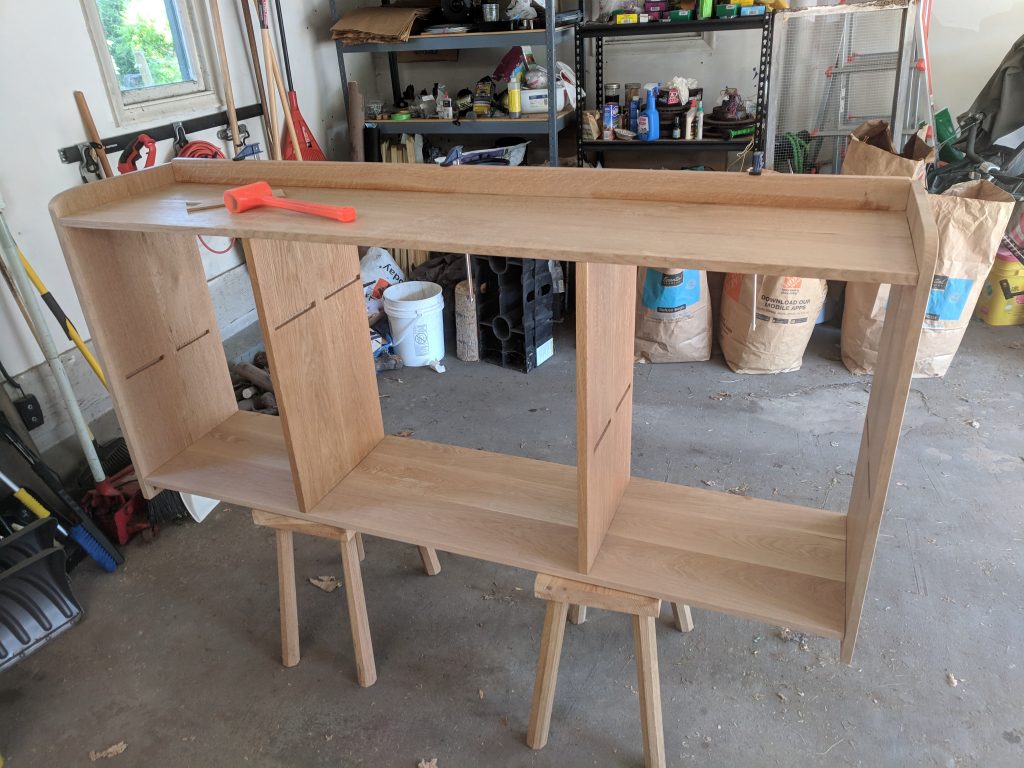
I decided to take the design details and adjust the dimensions to suit my space. I measured all of the objects I wanted to put in and on it and modeled them in SketchUp. Then I built the cabinet around that. The height was chosen from our average seating height. After a bunch of fiddling, I decided on a 2-3-2 ratio for the compartments along the front, based on the height of 3 units. I chose 16″ for the depth, because most white oak I’ve found is only up to about 9 or 10 inches wide. This would let me glue up only two boards for each panel.
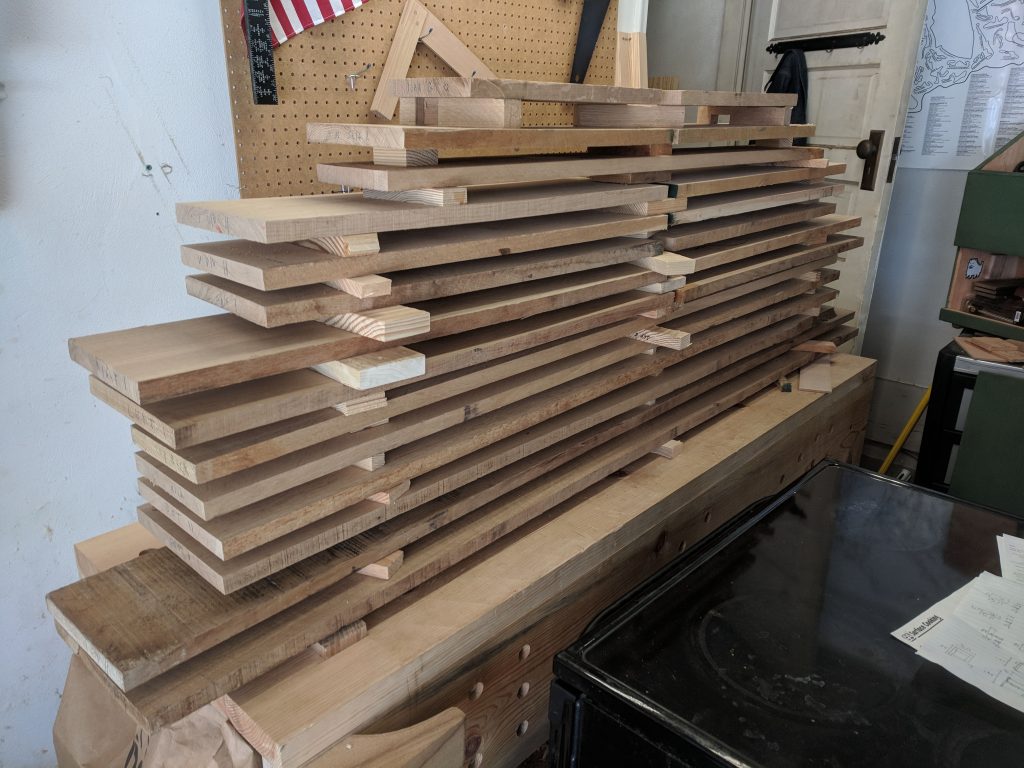
I used quartersawn white oak for all of the outer show faces (top, sides, doors, kick and backsplash) and plainsawn white oak for the internal pieces (shelves, vertical dividers and bottom). It took me about three hours at the lumber yard to sort through the stack and find nice looking, wide quartersawn pieces. When I reassembled the stack, I left the other wide pieces I had found near the top. I hope the next person appreciated it.
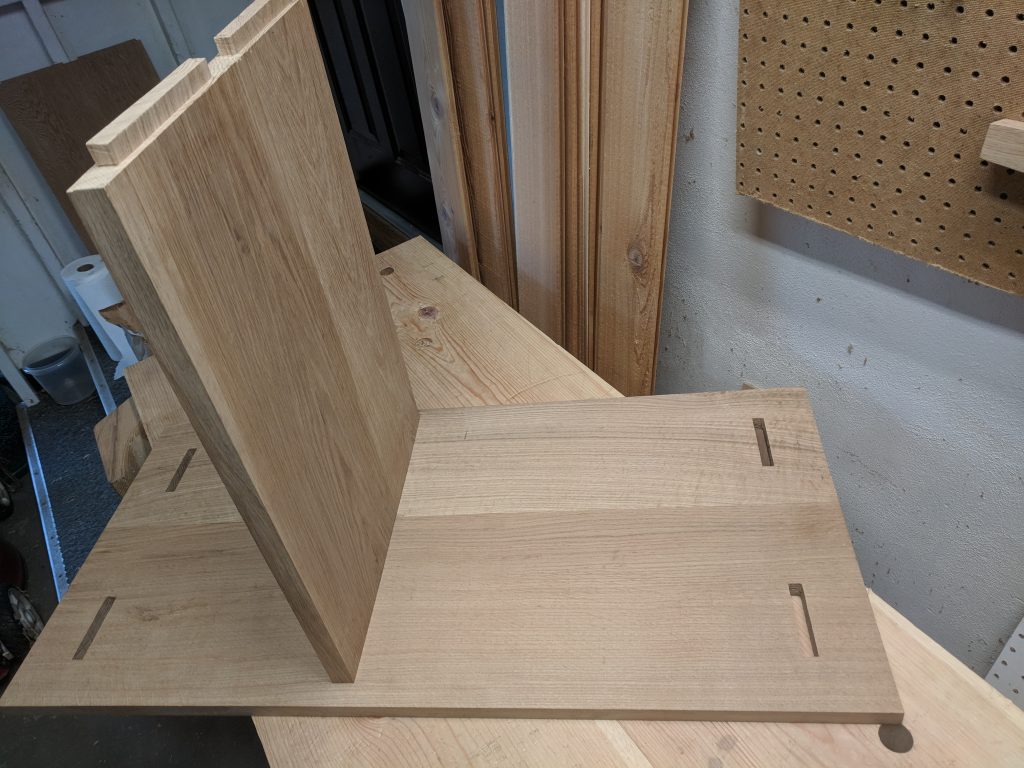
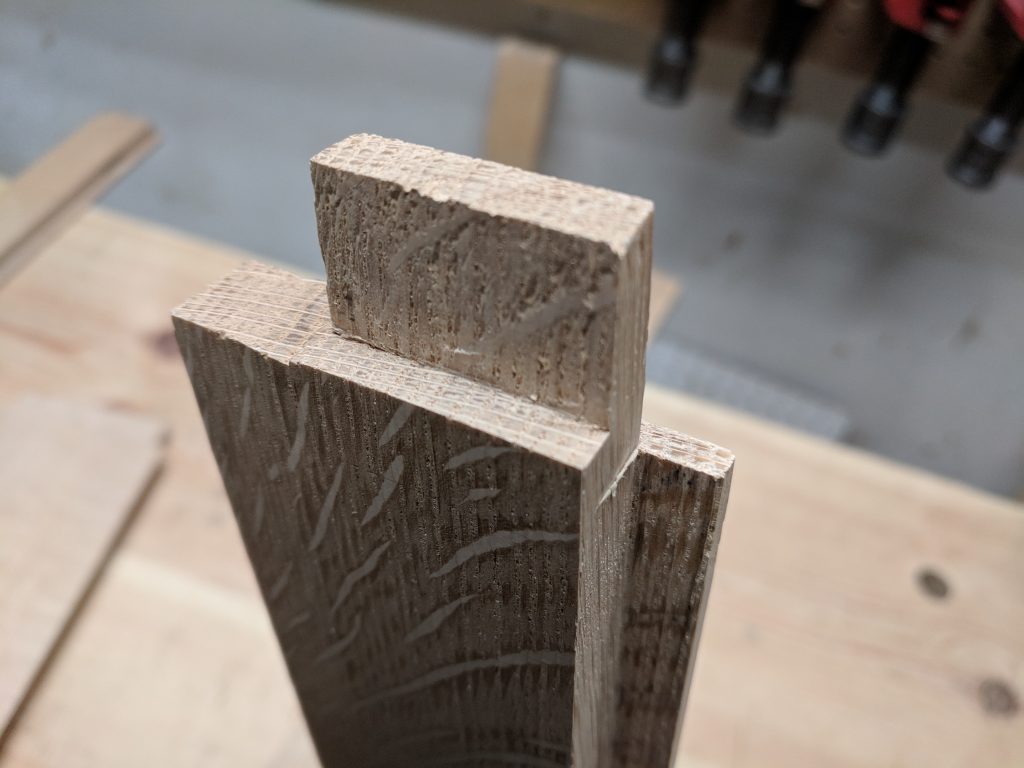
Where the cat tower had been intended as a quick and dirty practice project, I really wanted to focus on good execution for this project. I spent a long time selecting which parts of the lumber would be used for each part. I chose the most dramatic ray fleck for the sides and door fronts. What was left, I used for the top. After breaking down the boards and surfacing them with the jointer and planer at a shared workspace, I got to work on the joinery with my hand tools. I used wide-but-short mortise and tenon joints for most of the joinery. Most of these I actually cut with my Lie-Nielsen rabbeting block plane, then cut the remaining shoulders with a backsaw. The mortises were hogged out with a drill and cleaned up with a chisel.
The through-tenons are a key design focus, so I really wanted to get those right. I practiced twice on some offcuts, finally feeling confident after the second try. I used painter’s tape to lay out the mortise, and a power drill to hog out most of the waste. I cleaned up the edges with a frequently-sharpened chisel, always working from the outside in. I’m very happy with how they turned out, especially considering there were eight of them to cut, which is a lot of chances to screw up.
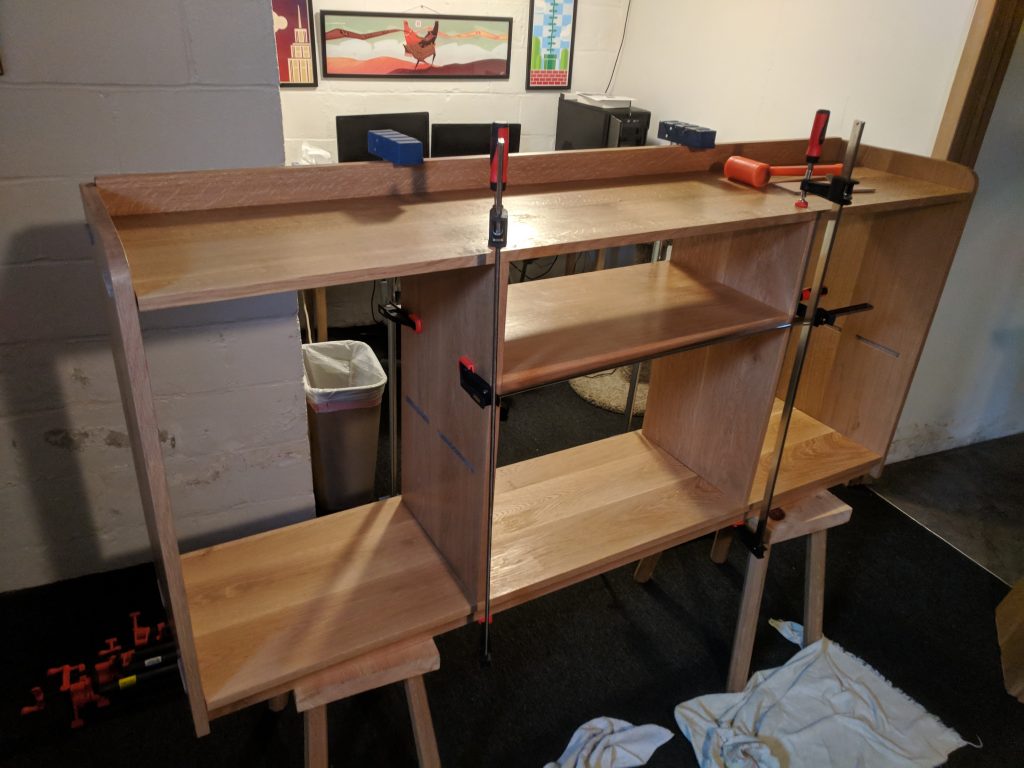
While I was building this project, Mike’s book “The How and Why of Woodworking” was released. While this piece isn’t in his book, it does use a lot of the design details that he describes there. One in particular that I like is creating a subtle depth to the piece by offsetting each component by about 1/16″ from its neighbors. Following that lead, the top and bottom are 1/16th narrower than the sides, the vertical dividers another 1/16th from that, and the center shelf another 1/16th narrower than that. The doors are set back from the sides such that they close a little further back from the dividers, and even the stiles on the doors were planed down about 1/16th in thickness from the rails. It creates a bunch of shadow lines that give the piece depth in raking light that would otherwise be flat. It’s a subtle detail, but adds a lot to the piece for you to look at.
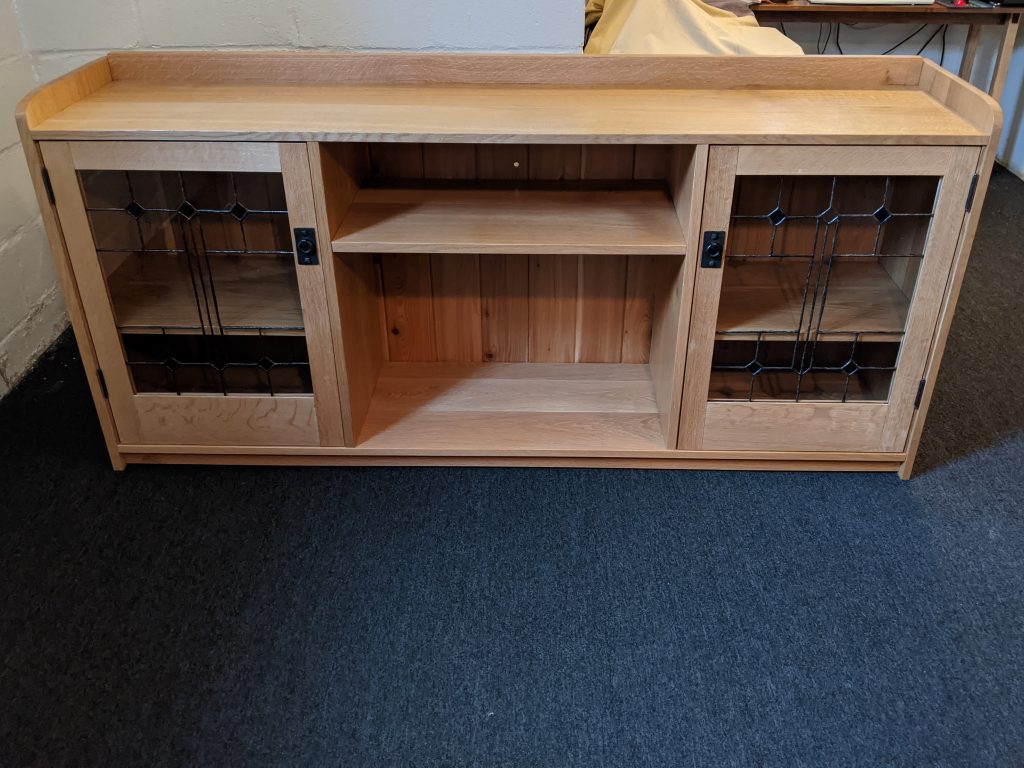
As I was nearing completion on the case, one thing that struck me was how much more it looked like “furniture” with the kick and backsplash than without. Compare for yourself, it seems to go from “assembly of components” to “furniture” with just those two components added. Maybe those small components are more important than they seem. Maybe there’s some design element to play with here? Maybe it’s nothing more than the addition of a front-facing component. I’m not sure.
I pre-finished the case with shellac before assembly. This was my first time using shellac. I found it a really pleasant finish to work with. I was able to finish all of the parts in two or three Fall evenings (read: “short evenings”). I used BT&C Amber Shellac Flakes dissolved in denatured alcohol from the hardware store. I used Mike’s shellac technique, which is 4 parts alcohol to 1 part dissolved flake mix, applied thinly with a rag.
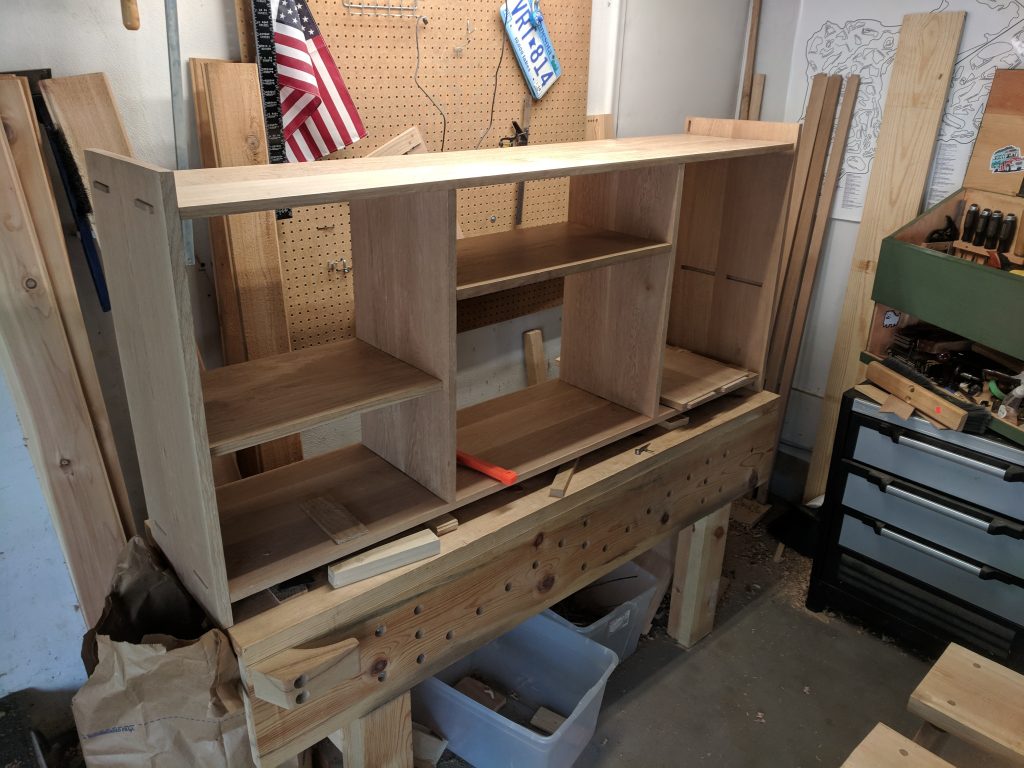
Glue-up was fairly straightforward. We did it in three parts, first gluing the backsplash and kicks to the top and bottom, then gluing the vertical dividers and center shelf to the top and bottom, then finishing up with the other two shelves and the sides. I wedged the through-tenons with oak wedges while it was in clamps, and cleaned them up with a backsaw and chisel after drying. The back was assembled from cedar tongue-and-groove boards from the hardware store. I cut a shallow rabbet for the back and nailed it to the shelves and vertical dividers. I didn’t bother surfacing or finishing the back.
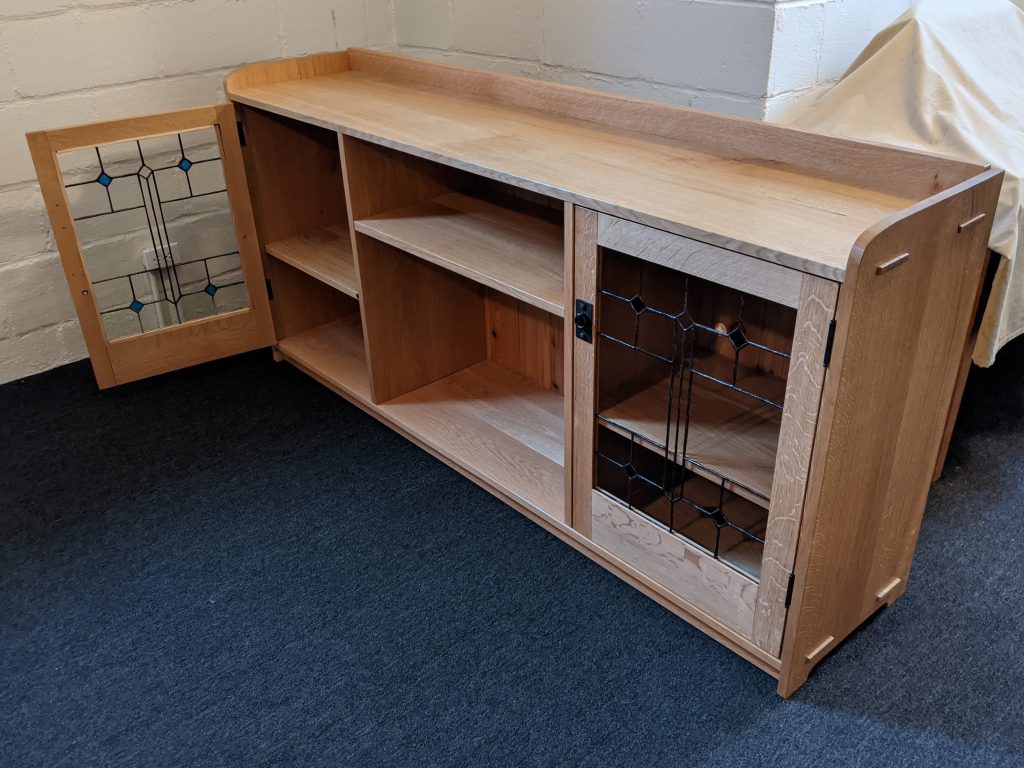
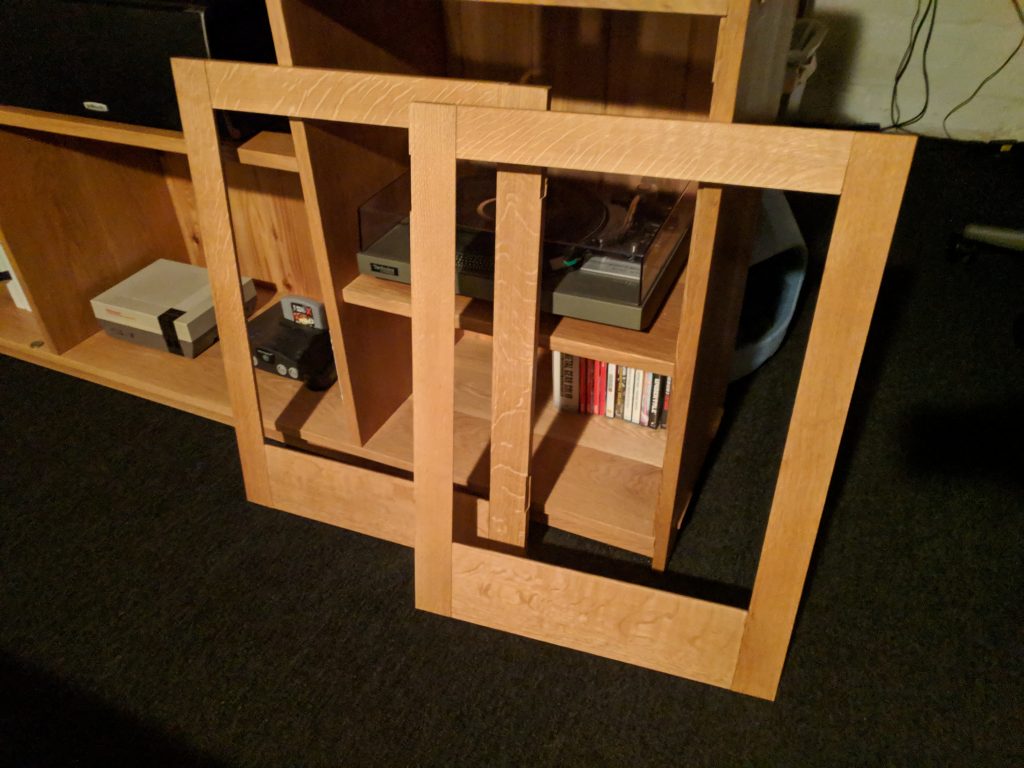
At this point I had a functional cabinet, and it looked great. I moved all of my stuff into the cabinet and started using it. But the doors still needed to be made, so that came next. Since I was going to insert a glass panel, the door rails and stiles needed a rabbet along the back of the inside edge. I used the layout technique from Lost Art Press’s The Woodworker collection, which described how to lay out the rabbets and the tenon shoulders of different depths to account for the rabbet, so there aren’t any gaps in the final joined piece. Since I’ve never done this before, it took me a solid hour to lay out all of the joinery for the first door, triple-checking every line I scribed. After the layout, though, it was simple, just cut the rabbet and then cut the tenon like any other. I cut mortises in the doors for the hinges, and added a hinge strip to the cabinet to set the doors into the cabinet a little bit, following Pekovich’s example. This was my first time hanging doors, and I’m extremely pleased with how well they fit. After some planing down, they have a nice even gap all around, with no twist.
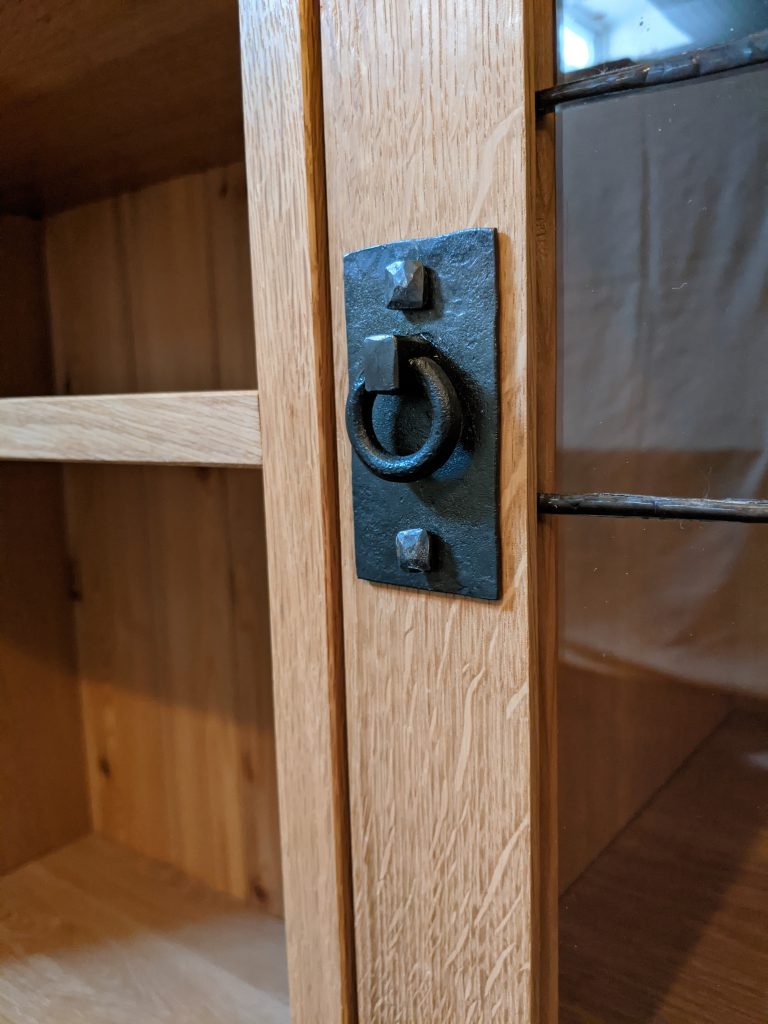
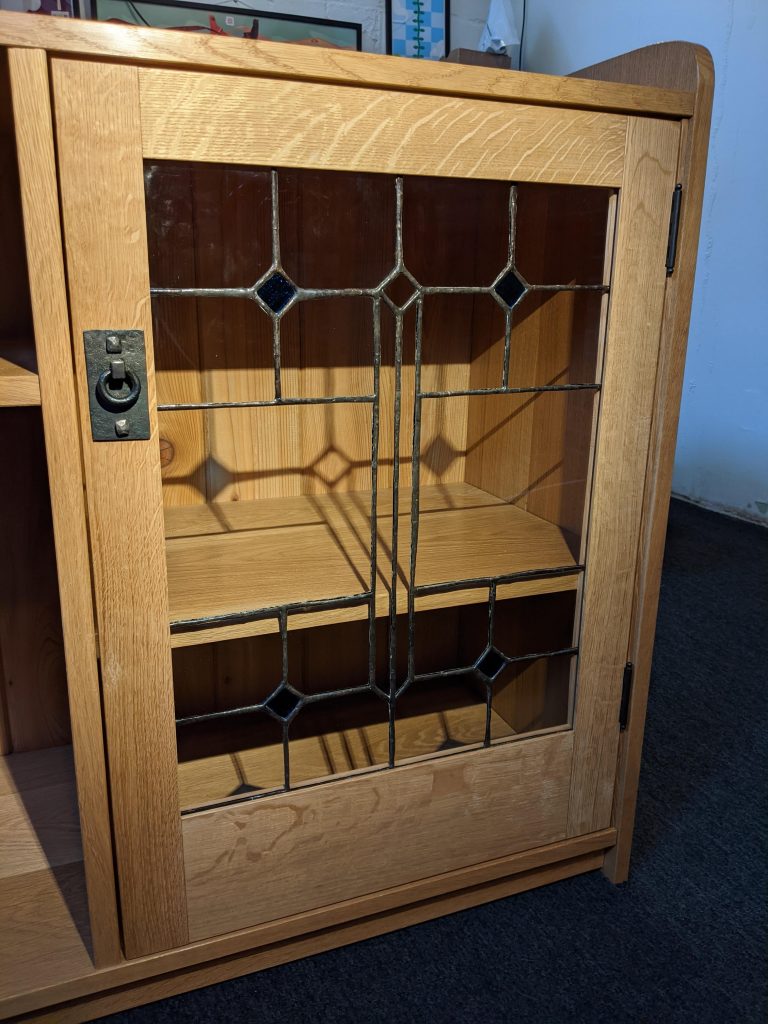
A few years ago I took a single evening intro to blacksmithing class. After the class, I took the instructor‘s business card. I hired him to make a planing stop for my workbench and, now, arts-and-crafts styled door pulls for this cabinet. They turned out fantastic, and he even included hand-wrought nails to mount the hardware with. I ended up just drilling pilot holes for the nails, driving them in, and then snipping off the pointy bit with some heavy wire cutters. So the nails poke through the back a little bit. I think it looks OK, though.
I have a good friend who makes glass panels as a hobby, and she agreed to make panels for my cabinet in return for some woodworking project in the future. As you can see, the panels turned out amazing. I mounted them with some thin strips of wood glued into the rabbet in the door.
With all that, the cabinet was completed! I’m very happy with how it turned out. I think it’s the finest piece I’ve ever made. There are some things I might have done differently—I’m not very happy with how the joints for the shelving turned out (lots of gaps), and the through-tenons are a little rough—but the number of things that went right really makes the piece shine.